
Fun Witchy Nail Designs for Halloween

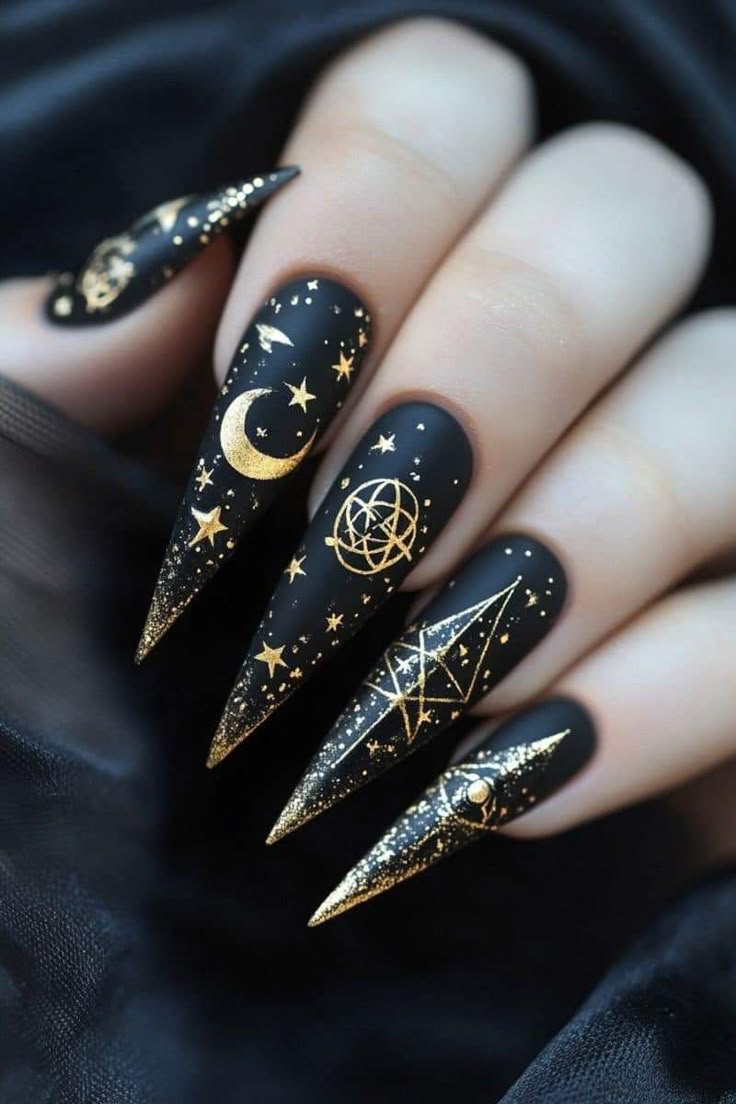

Fun Witchy Nail Designs for Halloween – If you’re drawn to moons, stars, and a little bit of magic, mystical witchy nails are made for you. Whether you love black witchy nails, celestial sparkle, or soft, fairytale designs, there’s something about this trend that feels both mysterious and empowering. From glowing galaxies to delicate moon phases, witchy nail designs blend shimmer, depth, and symbolism- a perfect way to express your inner goddess every time you look down at your hands.
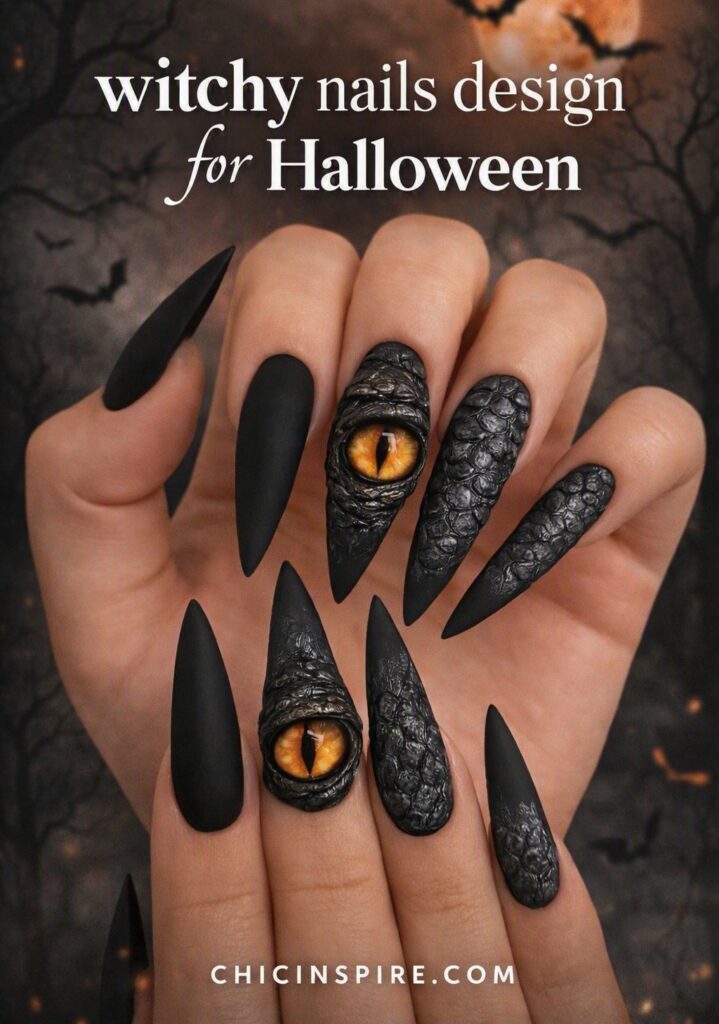
Table of Contents
Q&A
What colors work best for witchy nails?
Black, navy, emerald green, deep purple, plum, and matte finishes. Metallic accents in gold or silver add magic. For fairytale vibes, pastel bases with dark symbols work well.
What symbols should I use for witchy nails?
Moons, stars, constellations, eyes, serpents, runes, pentacles, spirals, and mushrooms. Choose symbols that resonate with your personal spiritual or aesthetic preferences.
Can I do witchy nails at home?
Yes! Start with simple designs, matte black with a single moon or star. Use nail art tools, stickers, or stamps for symbols. Blooming gel creates smoky effects.
Are witchy nails only for Halloween?
No, witchy nails work year-round. They’re especially popular during spooky season but remain a style choice for anyone drawn to mystical aesthetics.
What finish works best for witchy nails?
Matte topcoats give a soft, smoky, mysterious look. Glossy or glitter finishes add drama. A combination (matte base with glossy accents) is a modern trend.
Why Witchy Nails Are Trending
Witchy nails are powerful, enchanting, and packed with moody personality. They’re dramatic enough for a full witchy aesthetic yet timeless enough for everyday wear. The trend encompasses everything from dark glamour to celestial energy and witchcore cottage vibes. Witchy nails work year-round but especially shine during spooky season when everyone embraces their darker side.
Different Types of Witchy Nails
Design Themes at a Glance
Whether you’re planning an event, curating a collection, or designing a space, these themes offer endless inspiration. Here’s what each one brings to the table:
Celestial
Moons, stars, constellations, and suns. Ethereal, dreamy, and timeless, this theme captures the wonder of the night sky. Think deep blues, shimmering golds, and cosmic energy.
Dark Glamour
Black matte finishes meet metallic accents. Moody, luxurious, and undeniably chic, this theme is for those who love drama with a polished edge. Think velvet, gold details, and candlelit vibes.
Nature-Inspired
Mushrooms, vines, leaves, and forest elements. Earthy, organic, and grounding, this theme brings the outdoors in. Think lush greenery, natural textures, and woodland charm.
Symbolic
Runes, pentacles, spirals, and all-seeing eyes. Mystical, meaningful, and deeply personal, this theme is for those drawn to ancient symbols and spiritual energy. Think bold graphics and intentional design.
Crystal & Gemstone
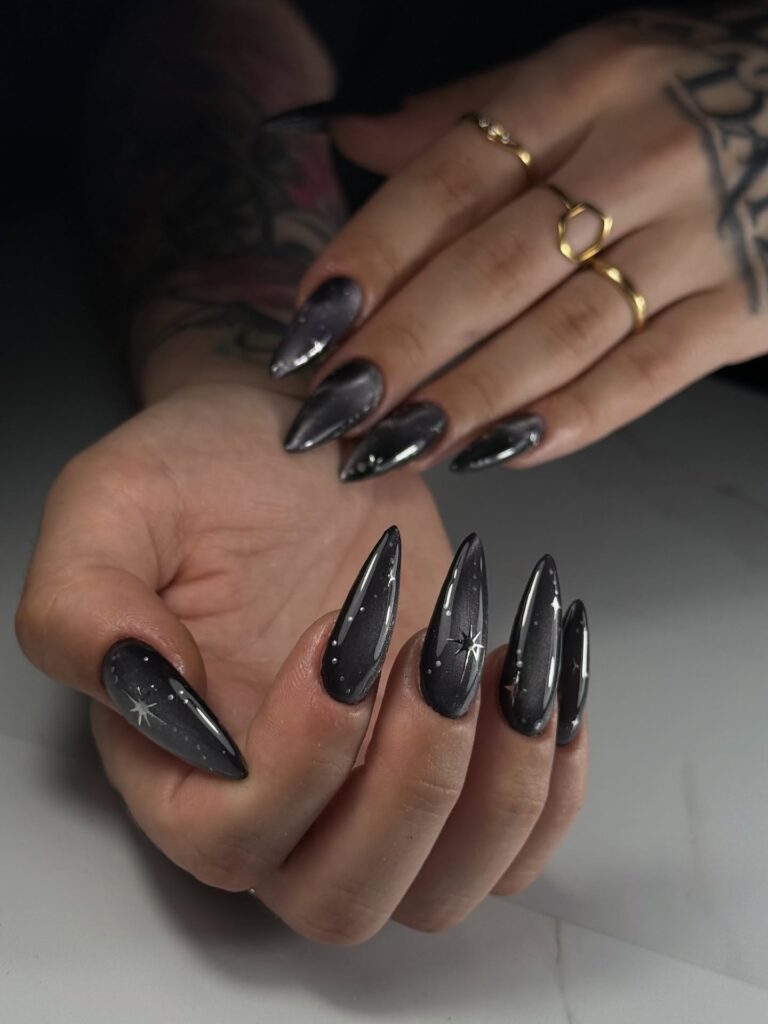
Marbled effects mimicking smoky quartz and obsidian. Sleek, modern, and texturally rich, this theme adds a touch of earth-born luxury. Think swirling grays, deep blacks, and polished finishes.
Gothic Lace
Delicate black patterns with Victorian energy. Romantic, intricate, and hauntingly beautiful, this theme is for lovers of old-world elegance. Think filigree, velvet ribbons, and candlelit romance.
Pro Tip:
Mix and match themes for a truly unique look. Celestial meets Gothic Lace? Ethereal and romantic. Dark Glamour meets Crystal? Moody luxury at its finest. Let your imagination lead the way.
By Color Palette
Your color palette sets the mood. Here’s how to choose the right tones for your design aesthetic:
Black-Based
Matte or glossy finishes with celestial or metallic accents. Bold, dramatic, and endlessly versatile, this palette is a classic for a reason. Think deep black backgrounds with shimmering gold, silver, or starry details.
Dark Moody
Navy, emerald, deep purple, and plum. Rich, intense, and sophisticated, these colors bring depth and mystery. Perfect for fall, winter, or any design that calls for a brooding, elegant vibe.
Neutral with Symbols
Muted bases (beige, gray, cream) with bold black or metallic details. Subtle yet striking, this palette lets symbols and patterns take center stage without overwhelming the eye.
Pastel Witchy
Soft, fairytale-inspired designs. Think lavender, blush, mint, and baby blue, delicate and dreamy with a hint of mystical charm. Perfect for those who want whimsy without the darkness.
By Style Complexity
From clean and simple to intricately detailed, choose the level of detail that suits your vision.
Minimalist
Simple moons, stars, or single symbols. Clean lines, negative space, and understated elegance. Perfect for those who prefer their designs subtle and sophisticated.
Detailed
Hand-painted scenes, constellations, or full nail art. Rich in texture, layered, and intricately crafted. Ideal for statement pieces or when you want your design to tell a story.
Textured
Matte topcoats, glitter accents, and rhinestones. Tactile, dimensional, and eye-catching. Add sparkle and depth with materials that catch the light and invite a second look.
Pro Tip:
Mix a moody color palette with minimalist symbols for understated drama, or pair pastel witchy tones with textured finishes for a soft but dimensional look. Let your palette and complexity level work together to create exactly the vibe you’re after.
Style Tips for Witchy Nails
Embracing your mystical side starts at your fingertips. Whether you’re drawn to celestial symbols, moody hues, or textured finishes, these tips will help you channel the perfect witchy vibe, one nail at a time.
Go Dark and Moody
Black, navy, and emerald green set the perfect backdrop. These deep, rich tones create a canvas that feels mysterious, powerful, and undeniably witchy, letting every detail pop.
Add Celestial Symbols
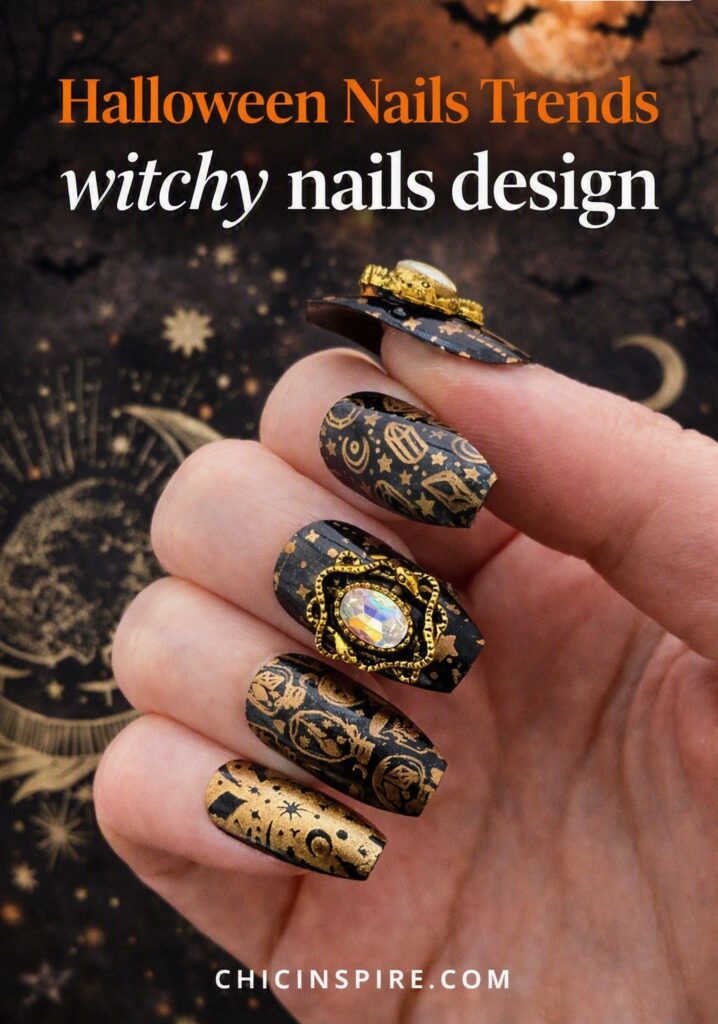
Moons, stars, constellations, and eyes add meaning and intrigue. Whether hand-painted or applied as decals, these symbols transform your nails into miniature works of cosmic art.
Use Metallic Accents
Gold or silver foil can turn a simple design into something truly magical. Add a crescent moon in gold, or brush silver foil across a matte black base for instant alchemy.
Experiment with Finishes
Matte topcoats give a soft, smoky effect, perfect for a velvety, mysterious look. Glossy finishes add drama and shine, ideal for capturing the light during moonlit nights (or well-lit cocktail hours).
Keep It Balanced
Bold art pairs best with soft neutral accents. If your design features intricate symbols or cosmic scenes, balance it with a few clean, understated nails—think celestial chaos meets minimalist calm.
Consider Intention
Runes and symbols carry specific meanings. Research your designs before you paint, whether you’re seeking protection, wisdom, or lunar energy, let your nails tell a story that aligns with your intentions.
Pro Tip:
Mix finishes within one look, matte and glossy together create contrast and depth. Pair a matte black base with glossy metallic symbols, or add a single glossy accent nail to break up a moody matte set.
Trendy Fake Black Halloween Nails
Trends to Follow in Witchy Nails
Witchy Nail Designs to Try
From celestial motifs to gothic lace, these design ideas will help you channel your inner magic. Mix, match, and experiment, each one brings its own unique energy to your fingertips.
Matte Black with Glossy Accents
Contrast textures for instant depth. A matte black base with glossy symbols, moons, or geometric lines creates a look that’s bold, modern, and undeniably striking. The interplay of finishes catches the eye and adds dimension without overwhelming the design.
Celestial Nail Art
Moons, stars, and constellations remain the ultimate witchy staple. Whether hand-painted or created with decals, these cosmic motifs feel timeless and mystical. Go for a single celestial accent nail, or scatter stars across every tip.
Rune and Symbol Details
Personal and meaningful, this is nail art with intention. Research runes or symbols that resonate with you (protection, intuition, strength) and incorporate them into your designs. A simple black rune on a neutral base can be just as powerful as an elaborate full-set layout.
Crystal-Inspired Finishes
Marble, swirl, and shimmer. Nail art that mimics smoky quartz, amethyst, or obsidian adds an earthy, gemstone feel. Use a water-marble technique or layered polishes to create depth and movement, each nail becomes one of a kind, like a real crystal.
Gothic Lace Patterns
Delicate, intricate, and Victorian-inspired. Fine black lace designs over soft neutral bases create a romantic, old-world elegance. Perfect for those who want something more refined, witchy, but still gallery-worthy.
Metallic Accents
Gold and silver details for a touch of magic and glamour. Whether through foil, fine line work, or chrome powders, metallic accents catch the light and add an instant wow factor. Layer them over dark bases for a celestial vibe, or over soft tones for a dreamier effect.
20 Witchy Nail Inspirations
From celestial symbols to gothic lace, here are 20 mystical nail ideas to inspire your next manicure. Each design includes a brief description, styling tips, and simple application steps.
Matte black with silver crescent moons
A modern classic, moody, minimalist, and effortlessly witchy.
Tips: Use a matte topcoat for a velvety finish; paint silver moons on one or two accent nails.
Short Guide: Apply black polish, matte topcoat, then hand-paint or stamp small silver crescent moons on ring finger and thumb.
Black with gold celestial symbols (serpents, moons, all-seeing eyes)
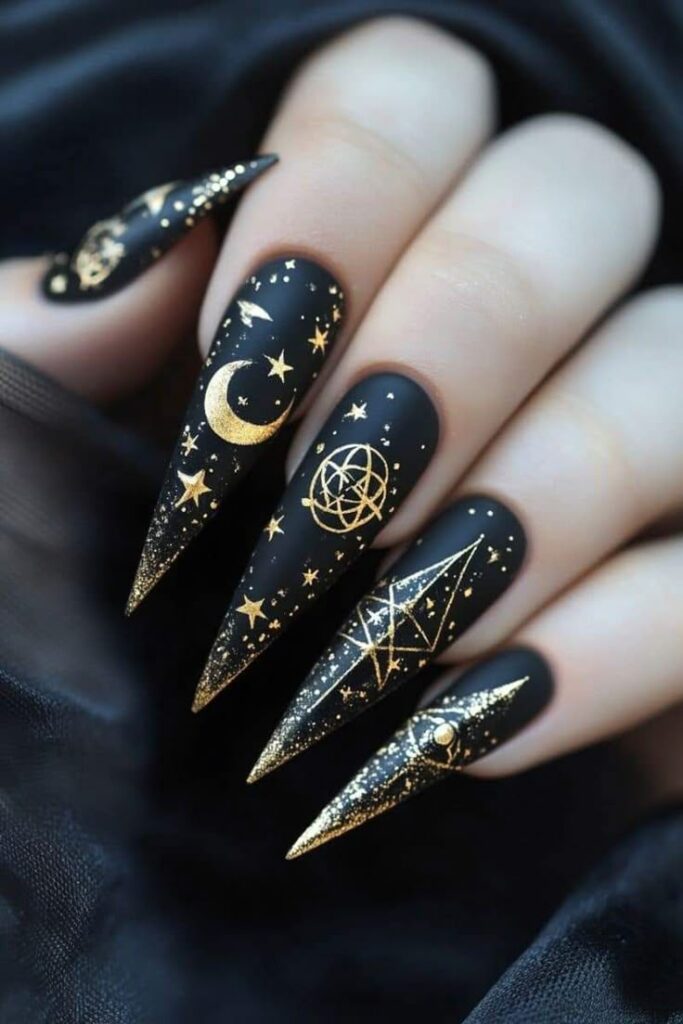
Bold, intricate, and packed with meaning.
Tips: Use gold foil or fine liner brushes for precision; balance detailed nails with simpler ones.
Short Guide: Paint black base, then add gold symbols using a detail brush, serpents on one nail, eyes on another, moons on the rest.
Deep purple galaxy glitter with moon and star details
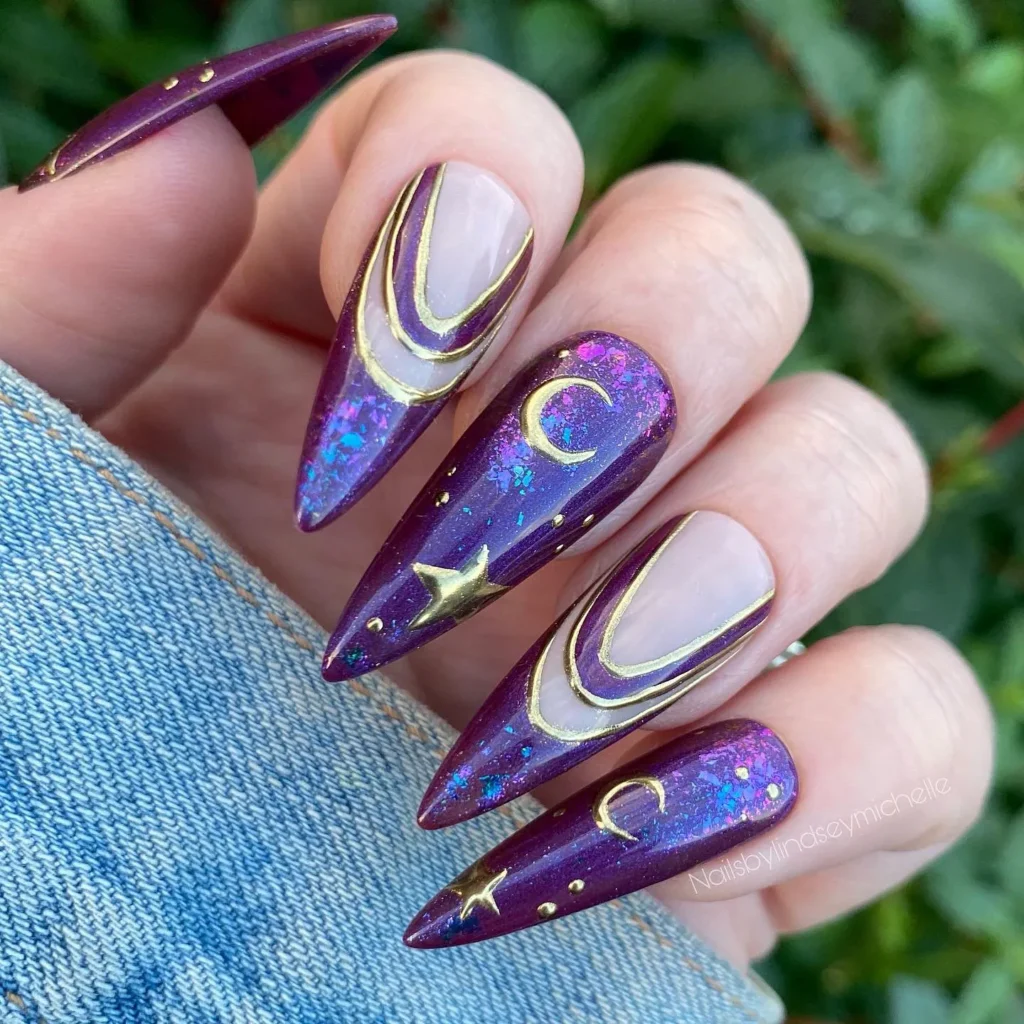
Cosmic, dreamy, and multidimensional.
Tips: Layer glitter polish for depth; silver or gold stars pop best on purple.
Short Guide: Apply deep purple polish, layer glitter or galaxy-effect topcoat, then add metallic moon and star decals.
Matte plum with gold moons and stars
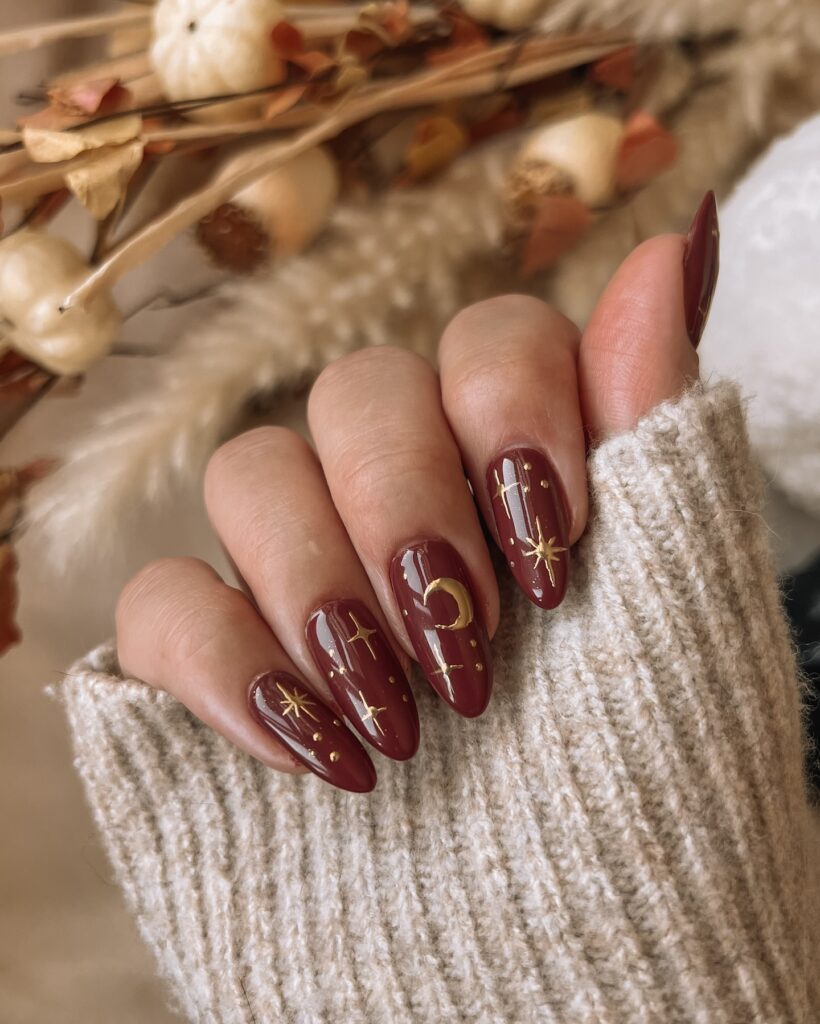
Rich, warm, and sophisticated with a celestial twist.
Tips: Matte plum reads elegant; gold foil adds luxury without overwhelming.
Short Guide: Paint plum base, matte topcoat, then add small gold stars and moons on accent nails.
Black matte with delicate white crescent moons and stars
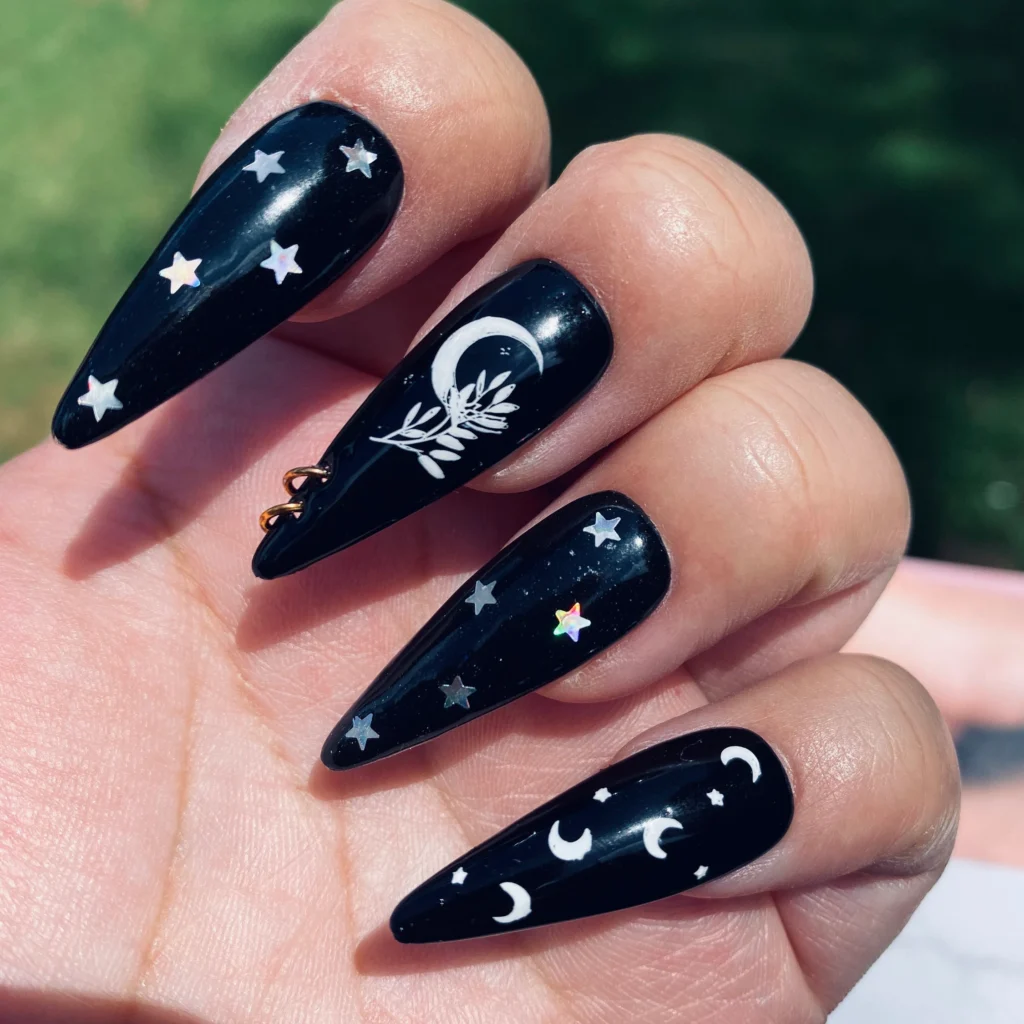
High contrast, soft details, clean and crisp. Not sure what colors to go with; well, black goes with everything. This is why black makes for the best look to pair with most, if not all, costumes.
Tips: White details over matte black pop beautifully; keep lines thin and precise.
Short Guide: Apply black polish, matte topcoat, then hand-paint tiny white crescents and stars on each nail.
Midnight blue ombré with silver stars and moons
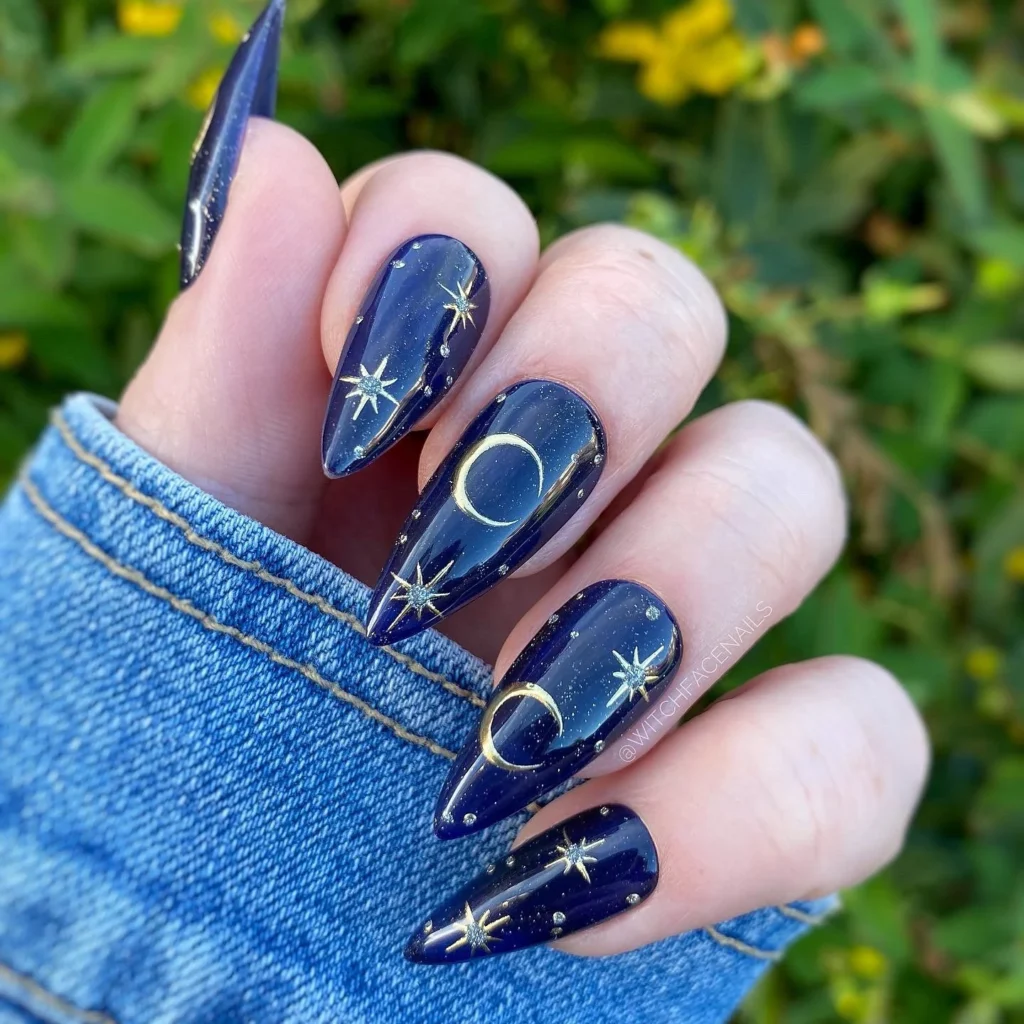
Stunning deep dark blue with moons and star design, pointy, perfect for Halloween because it gives off a witchy look. Not all witches wear black, and this nail design will help guide you to the perfect costume colors and design this season.
Tips: Use a makeup sponge to blend black to navy blue; silver details catch the light.
Short Guide: Create a blue-to-black ombré, then add silver stars and moons as nail decals or hand-painted details.
Deep emerald shimmer with fine silver celestial accents
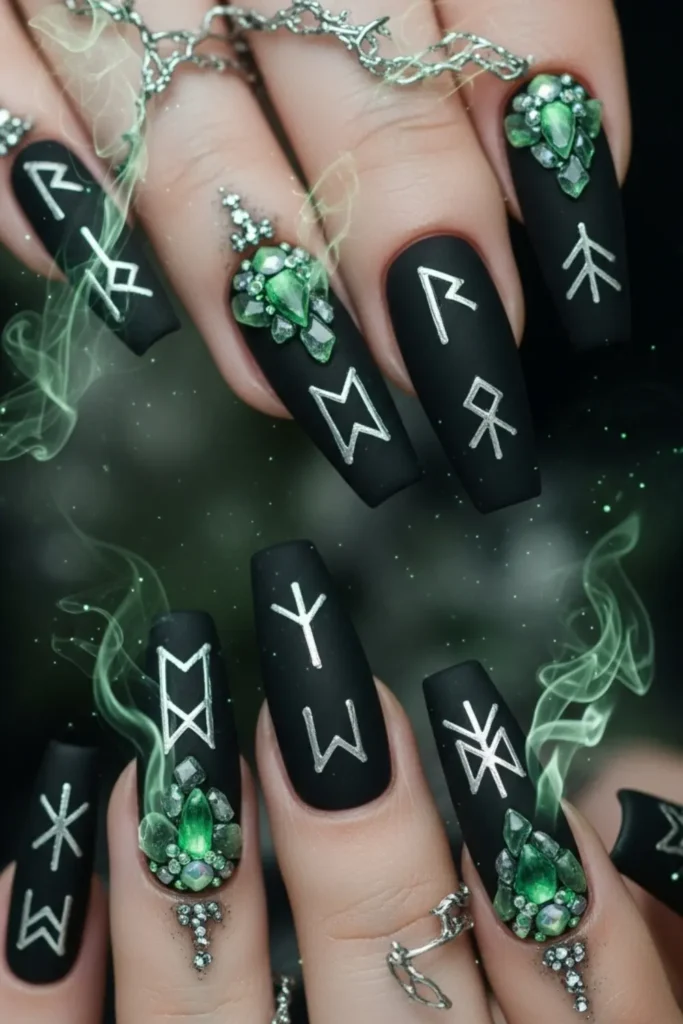
Jewel-toned elegance with a mystical edge.
Tips: Emerald green pairs beautifully with silver; let the shimmer base shine.
Short Guide: Apply deep emerald shimmer polish, then add thin silver celestial details using a fine brush or stamping.
Royal blue with golden constellations and sun motifs
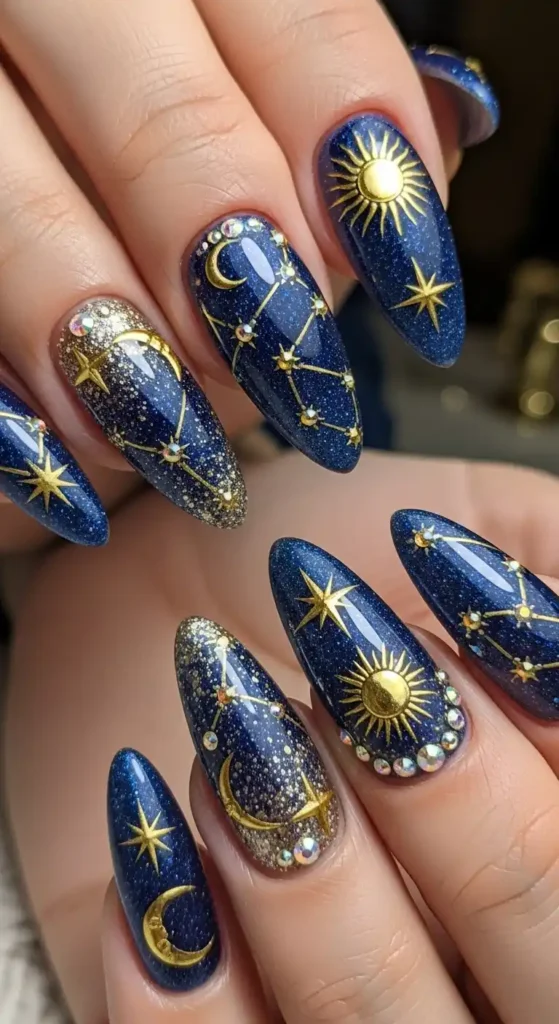
Rich, regal, and cosmic, like a midnight sky.
Tips: Gold pops brilliantly on blue; constellations work best as accent nails.
Short Guide: Paint royal blue base, then add golden sun motifs and constellation lines on ring and middle fingers.
Black with gold sparkles (simple celestial vibe)
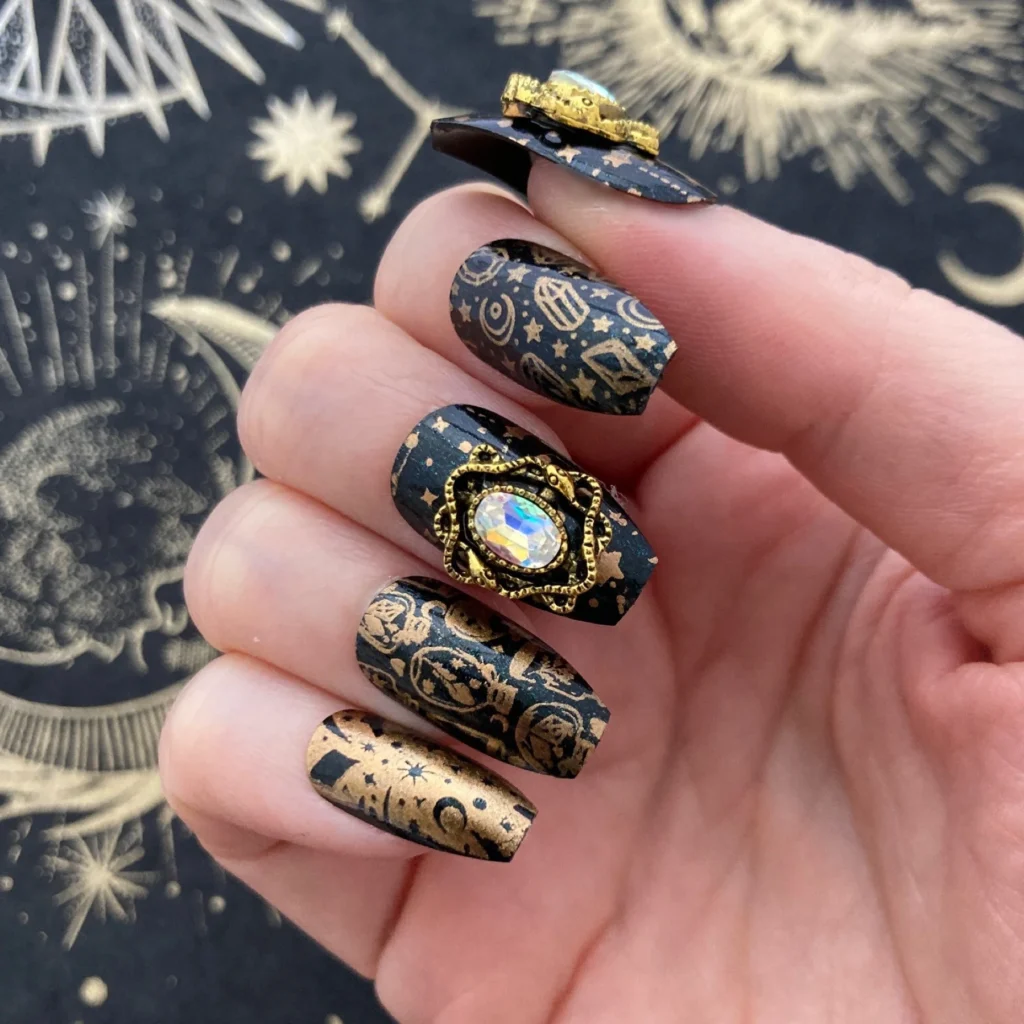
Subtle, sparkly, and effortlessly magical.
Tips: Gold glitter catches the light without overpowering; keep other nails matte for contrast.
Short Guide: Apply black base, then add a gold glitter topcoat on one or two nails, or use gold glitter polish in small patches.
Metallic spiral nails
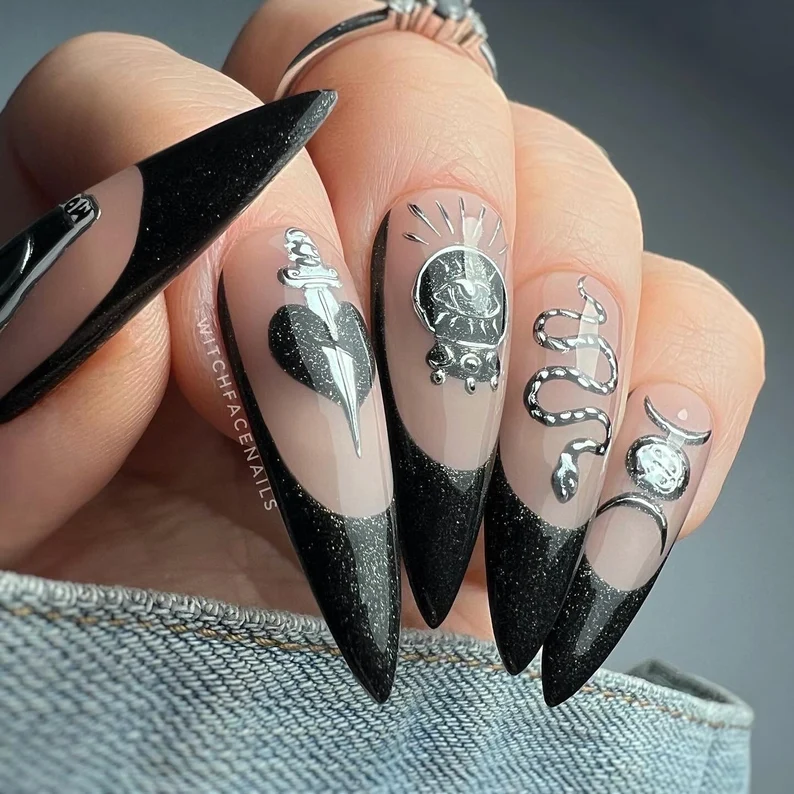
Hypnotic, modern, and minimalist.
Tips: Silver or gold metallic lines work best; keep other nails clean and simple.
Short Guide: Apply black base, then use a fine brush to paint metallic gold or silver spirals from the cuticle outward.
Black cat silhouettes with glossy accents
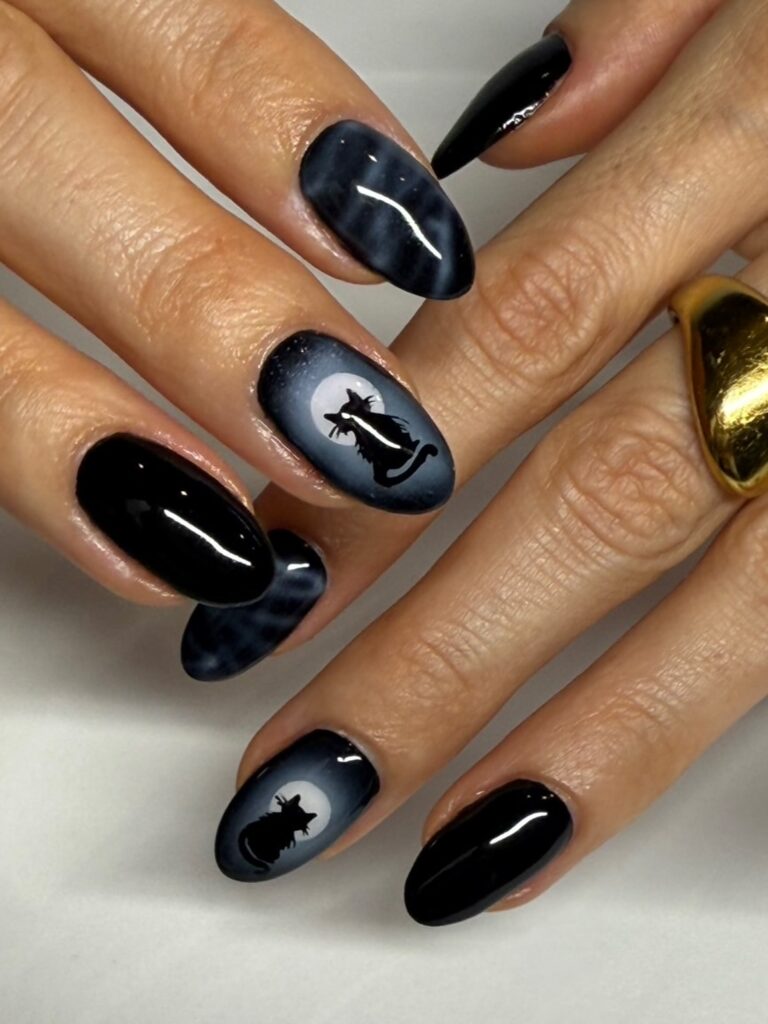
Playful, iconic, and instantly recognizable.
Tips: Pair glossy cat silhouettes with a matte base for contrast; a single cat accent nail works beautifully.
Short Guide: Paint a matte black base, then paint or stamp black cat silhouettes in glossy black on accent nails.
Black lace patterns on sheer grey base
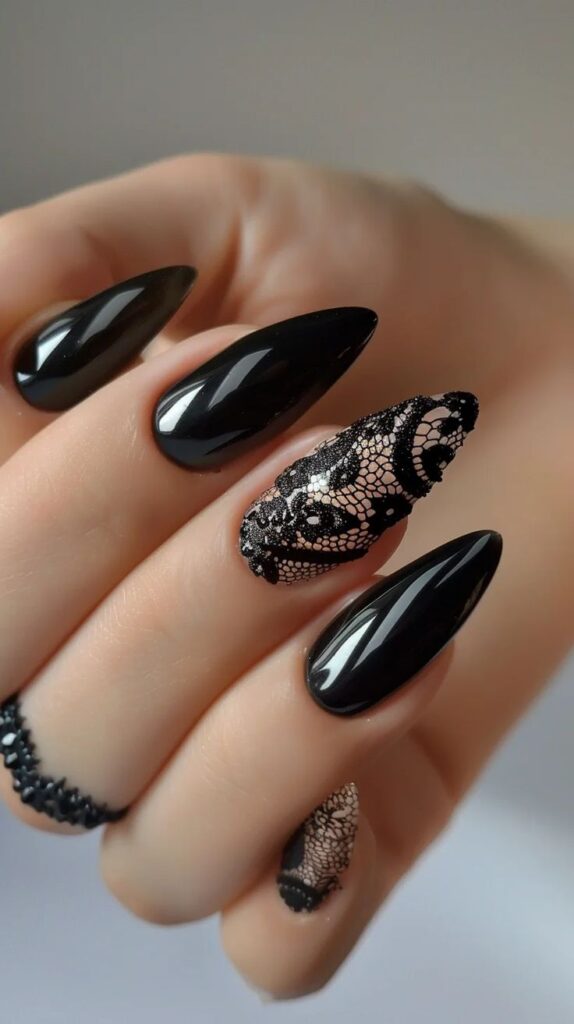
Delicate, romantic, and Victorian-inspired.
Tips: Sheer grey keeps it soft; black lace adds intricate detail.
Short Guide: Apply sheer grey polish, then stamp or hand-paint fine black lace patterns over each nail.
Crystal ball design (purple cat eye with black tips)
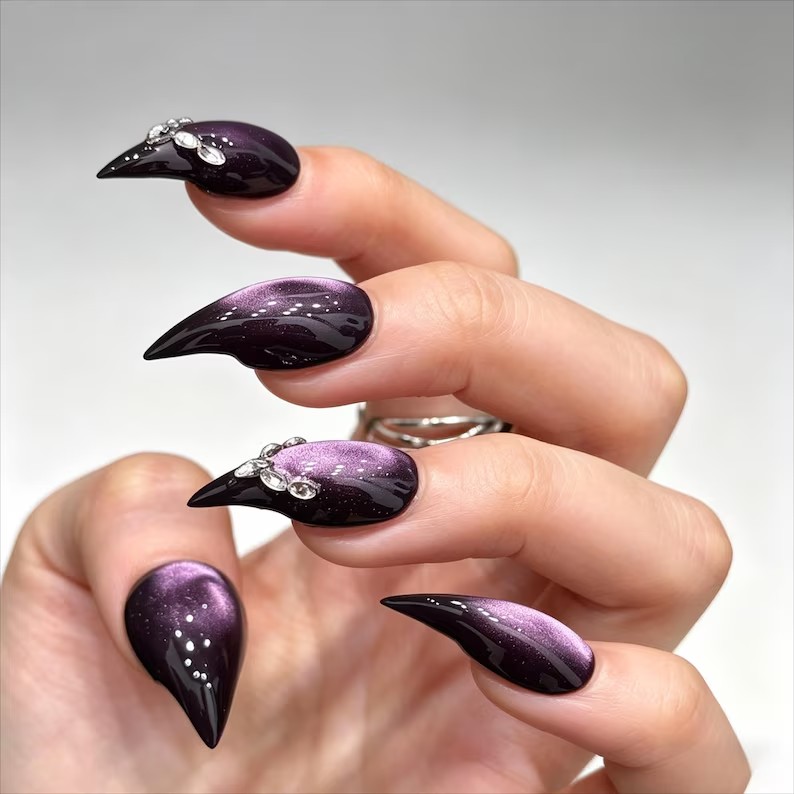
Mystical, dimensional, and center-stage worthy.
Tips: Use a cat-eye magnet for the purple base; black tips frame the design perfectly.
Short Guide: Apply purple cat-eye polish, magnetize for the cat-eye effect, then add black French tips with a dark polish.
Smoky effect nails (blooming gel technique)
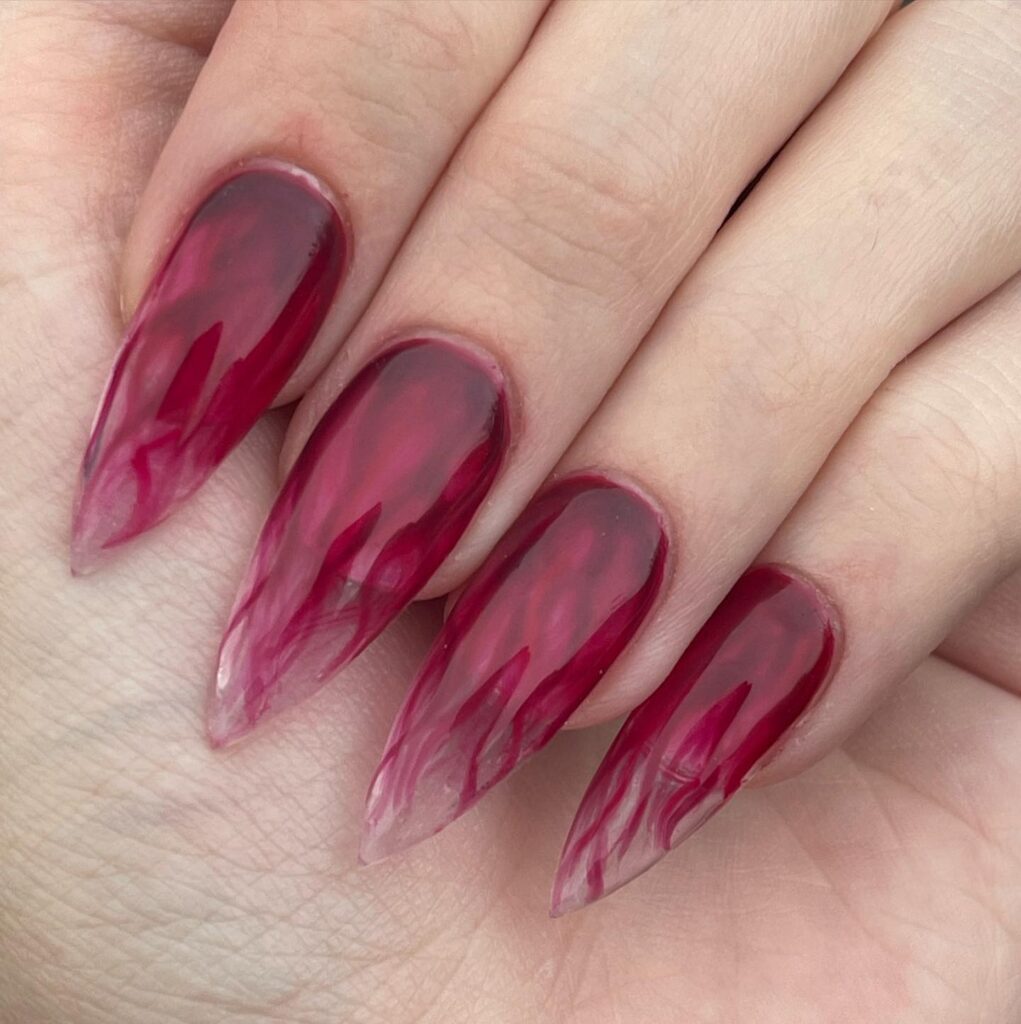
Soft, diffused, and ethereal, like smoke trapped in polish.
Tips: Blooming gel creates the smoky effect; use black and grey for a dramatic look.
Short Guide: Apply blooming gel base, drop black and grey polish onto the gel, watch it diffuse, then cure.
Rhinestone star nails (rainbow or black)
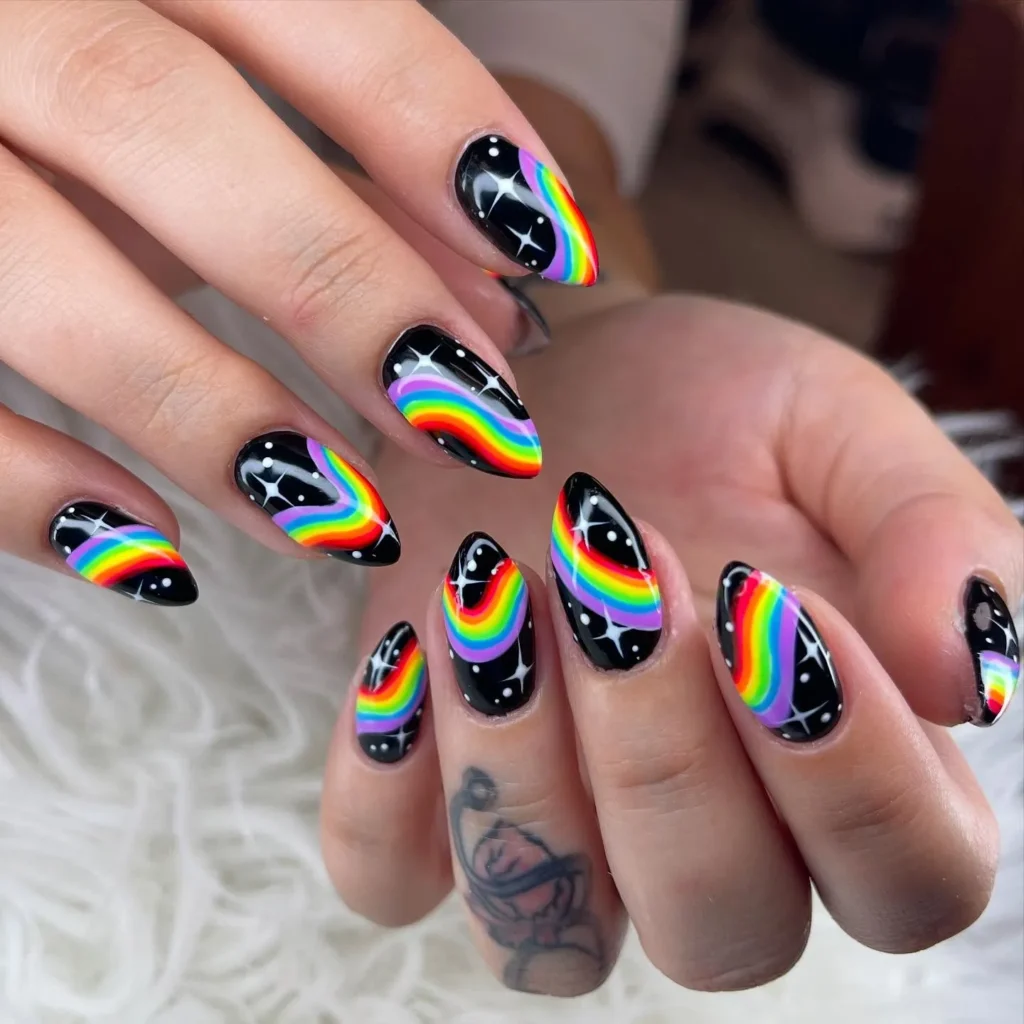
Glamorous, edgy, and perfectly witchy.
Tips: Use a clear base to let the rhinestones pop; star-shaped rhinestones are easy to apply.
Short Guide: Apply clear polish base, place star-shaped rhinestones on each nail or accent nail, then top with gel topcoat.
Black with green swirled cauldron-inspired nails
Bubbling, mysterious, and elemental.
Tips: Swirl black and green together for a cauldron-like effect; glossy topcoat adds depth.
Short Guide: Drop black and dark green polish onto a nail, swirl with a dotting tool, then cure and topcoat.
Mushroom and forest witchcore designs
Earthy, whimsical, and grounded.
Tips: Mushroom silhouettes in white or gold pop beautifully on a dark base.
Short Guide: Apply dark green or black base, then hand-paint small mushroom silhouettes and forest elements on accent nails.
Gothic lace with delicate patterns
Intricate, old-world elegance with a dark edge.
Tips: Fine black lines over a soft neutral base read romantic and refined.
Short Guide: Apply a sheer nude or grey base, then stamp or hand-paint intricate gothic lace patterns on every nail.
Smoky quartz marbled effect (grey with black)
Natural, stone-inspired elegance.
Tips: Marble layers of grey, black, and white for a realistic quartz effect.
Short Guide: Drop grey, black, and white polish onto the nail, swirl with a toothpick or marbling tool, then topcoat.
Wine red nails (simple witchy elegance)
Understated, rich, and effortlessly witchy.
Tips: Deep wine red needs no embellishment; let the color speak for itself.
Short Guide: Apply two coats of deep wine or oxblood polish, finish with a high-shine topcoat for a simple, elegant look.
Pro Tip:
Mix and match these designs across your fingers for a curated, eclectic look. A matte black base with one celestial nail, one gothic lace nail, and one metallic spiral? That’s witchy nail art at its most creative.
Detailed Guide: How to Get the Mystical Nail Look
Creating enchanting, witchy nails is easier than you think. Follow these six simple steps, from base color to protective topcoat, and you’ll have a mystical manicure that feels truly magical.
Step 1: Choose Your Base Color
Your base sets the entire mood. Pick a shade that matches your mystical vibe:
Dark and moody – black, navy, and emerald green create a dramatic, celestial backdrop.
Soft and fairytale – muted neutrals with dark accents offer a lighter, dreamier take on witchy style.
Step 2: Select Your Finish
Finish transforms the look entirely. Decide what energy you want to project:
Matte – soft, smoky, and mysterious. Perfect for a velvety, understated vibe.
Glossy – dramatic and polished. Captures the light and adds instant glamour.
Combination – matte base with glossy accents. The best of both worlds—contrast, depth, and visual interest.
Step 3: Add Celestial Symbols
Moons, stars, constellations, and suns bring the magic. Choose your method based on skill level:
Hand-painted – use a fine nail brush for intricate, one-of-a-kind designs.
Stamps or stencils – perfect for beginners. Quick, clean, and consistently beautiful results.
Decals – an easy, mess-free option for adding detailed celestial art.
Step 4: Incorporate Metallic Accents
Metallics add instant magic and glamour. Try one (or all) of these:
Gold or silver foil – delicate, eye-catching, and easy to apply.
Metallic polish – perfect for fine lines, dots, or full accent nails.
Rhinestones – add 3D sparkle for a truly show-stopping finish.
Step 5: Experiment with Textures
Texture adds dimension and depth to your mystical look. Consider these options:
Glitter or shimmer topcoats – add cosmic sparkle to any design.
Textured matte finishes – create contrast between smooth and velvety surfaces.
3D elements – raised details, charms, or studs for a tactile experience.
Step 6: Seal and Protect
Lock in your design and keep it looking fresh with proper finishing:
Top coat – apply matte or glossy to seal the design and add durability.
Cuticle oil – finish with a nourishing cuticle oil for a polished, professional look.
Pro Tip:
Don’t be afraid to mix steps; a glossy celestial symbol on a matte base with metallic foil accents creates a look that’s uniquely yours. The key is layering: start simple, then build depth and detail one step at a time.
Advanced Technique: Midnight Crescent Moon Nails
For those ready to level up their mystical manicure, this design is stunning, surprisingly achievable, and guaranteed to turn heads. Follow these steps to create a moonlit masterpiece.
Step 1: Start with a Matte Black Base
Apply a matte black gel polish as your foundation. This velvety, dark canvas creates the perfect night-sky backdrop, mysterious, dramatic, and ready for celestial details.
Pro Tip: Apply two thin coats for full, even coverage before curing.
Step 2: Paint Your Crescent Moons
Using a fine nail brush, paint thin, delicate crescent shapes in silver or white. Keep the lines clean and steady, steady hands create the most elegant crescents.
Pro Tip: Start with a simple curved line, then build the shape slowly for precision. Practice on paper first if you’re new to hand-painting.
Step 3: Add Starry Details
Using the same fine brush or a dotting tool, place tiny dots around your moons to mimic a starry night sky. Scatter them randomly for a natural, cosmic feel.
Pro Tip: Vary the dot sizes slightly, some tiny, some slightly larger, for a more authentic constellation effect.
Step 4: Seal with Glossy Contrast
Apply a glossy top coat only over the moon and star details, keeping the rest of the nail matte. This contrast creates depth and makes the celestial elements pop against the velvety black background.
Pro Tip: Use a small, precise brush to apply the glossy topcoat only on the design, avoid getting it on the matte areas for a clean, professional finish.
Step 5: Finish with Cuticle Oil
Complete your look with a nourishing cuticle oil. This final step adds a healthy, moonlit sheen to the surrounding skin and highlights the overall effect.
Pro Tip: Massage the oil gently into your cuticles for an instantly polished, salon-worthy finish.
Advanced Technique: Enchanted Rune Symbol Nails
For those ready to infuse their manicure with intention and ancient energy, this rune design is powerful, personal, and surprisingly elegant. Follow these steps to create a mystical look that tells a story.
Step 1: Apply a High-Gloss Black Base
Start with a high-gloss black gel polish as your canvas. The shiny, reflective surface creates a dramatic backdrop that makes every rune pop with clarity and precision.
Pro Tip: Apply two thin coats for a flawless, mirror-like finish. Cure fully between each layer.
Step 2: Paint Your Chosen Runes
Using a fine detail brush and white gel polish, carefully paint your selected runes onto each nail. Research the meanings beforehand—each symbol carries its own energy and intention.
Pro Tip: Keep strokes angular and clean for an authentic rune style. Straight lines and sharp angles are the hallmark of traditional runic writing.
Step 3: Add Magical Sparkle
Using a dotting tool or fine brush, apply micro-glitter around your key symbols. A subtle scattering of sparkle adds a magical, enchanted feel without overwhelming the design.
Pro Tip: Focus glitter at the base or tip of each rune for a subtle glow—think of it as the rune’s energy radiating outward.
Step 4: Seal with Glossy Top Coat
Finish with a high-shine glossy top coat. This locks in your design, adds durability, and enhances the contrast between the deep black base and the crisp white runes.
Pro Tip: Apply a thin, even layer to avoid smudging your design. If using gel, cure fully for a long-lasting, chip-resistant finish.
Events for Witchy Nails
When to Wear Witchy Nails: The Ultimate Occasion Guide
Mystical nails aren’t just for Halloween; they’re a year-round style statement. Here’s when and where to rock your enchanted manicure, from spooky season to everyday magic.
Halloween and Spooky Season
This is the obvious one, and it’s where mystical nails truly shine. Go bold with black cats, cobwebs, or glowing moons. It’s the perfect time to embrace full witchy drama without holding back.
Pro Tip: Matte black with glossy accents feels especially festive for October.
Fall and Autumn Events
Rich, moody shades like plum, emerald, and deep burgundy fit right in with cozy sweaters and falling leaves. Pumpkin patches, hayrides, and bonfires all call for warm, earthy witchy vibes.
Pro Tip: Pair deep wine or burnt orange nails with gold celestial accents for a fall-appropriate twist.
Mystical-Themed Parties
Tarot readings, full moon gatherings, or witchy get-togethers? This is your moment. Crystal ball designs, rune symbols, and galaxy glitter all feel perfectly at home.
Pro Tip: Go all-out with cat-eye or marble effects, they’ll spark conversation and fit the theme beautifully.
Everyday Magical Vibes
Who says witchy nails are only for special occasions? A subtle crescent moon on a neutral base or a single rune accent nail adds a touch of everyday enchantment. Perfect for coffee runs, work-from-home days, or casual outings.
Pro Tip: Keep it simple, minimalist celestial details work just as well for daily wear as bold full-set designs.
Music Festivals and Concerts
Festival season calls for bold, expressive nails that catch the light and stand out in a crowd. Think galaxy glitter, rhinestones, and metallic accents, all with a mystical twist.
Pro Tip: Add extra sparkle and 3D elements, festival nails should be as eye-catching as the performances.
Cosplay and Costume Events
Whether you’re channeling a sorceress, fairy, or celestial being, mystical nails complete the transformation. Match your manicure to your character’s energy and aesthetic for a fully immersive look.
Pro Tip: Research your character’s color palette and symbols, runes, moons, or elemental motifs add authenticity.
Self-Expression and Personal Style
Mystical nails are ultimately about you. Whether you’re drawn to dark glamour, celestial energy, or nature-inspired designs, your nails become a canvas for your identity. Wear them proudly, anytime, anywhere.
Pro Tip: Experiment with different themes until you find the style that feels most authentically you.
5 Things to Know About Witchy Nails
Symbols carry meaning, runes, pentacles, and celestial motifs have specific spiritual significance
Texture matters, matte vs. glossy creates different moods
Balance is key, bold designs work well with neutral accents
Witchy nails are for everyone, dark shades suit all skin tones
They’re empowering, the designs connect to intuition and magic
Shapes and Colors
Nail Shapes
Almond: Classic, witchy elegance
Coffin: Modern, bold
Stiletto: Dramatic, sharp
Round: Subtle, soft
Square: Clean, practical
Color Palette
Black and charcoal: Essential witchy base
Deep jewel tones: Emerald, royal blue, plum
Metallics: Silver, gold, bronze
Neutrals: Grey, smoky, muted
Accent colors: White, pale pink, lavender (for contrast)
Symbol Meanings
Crescent moons: Intuition, cycles, feminine strength
Stars: Guidance, hope, magic
Runes: Protection, clarity, luck, transformation
Pentacles: Protection, balance, elements
Black cats: Familiar magic, folklore
Mushrooms: Nature, green witchcraft
Lace: Victorian energy, gothic romance
Why Witchy Nails Design
Witchy nails are a beautiful reminder to slow down, tap into your intuition, and embrace a little everyday magic, right at your fingertips. Whether you love dark, witchy tones or dreamy celestial sparkle, mystical nails are the perfect mix of magic and elegance. Each look tells its own story, one that’s equal parts mysterious and empowering.